Welcome Gift

Whenever someone moves into our neighborhood, I try to welcome them with some goodies. My go-to goody was Rice Krispie treats, but these are only good the day you make them. If the new neighbors weren’t home the day I made them, I ended up eating them all myself. Not good :/. Plus, you never know who may have allergies or other food restrictions. I decided to rethink my welcome gift and opt for something practical yet relatively inexpensive. After searching the Internet for a while, here’s what I came up with:

Welcome Gift

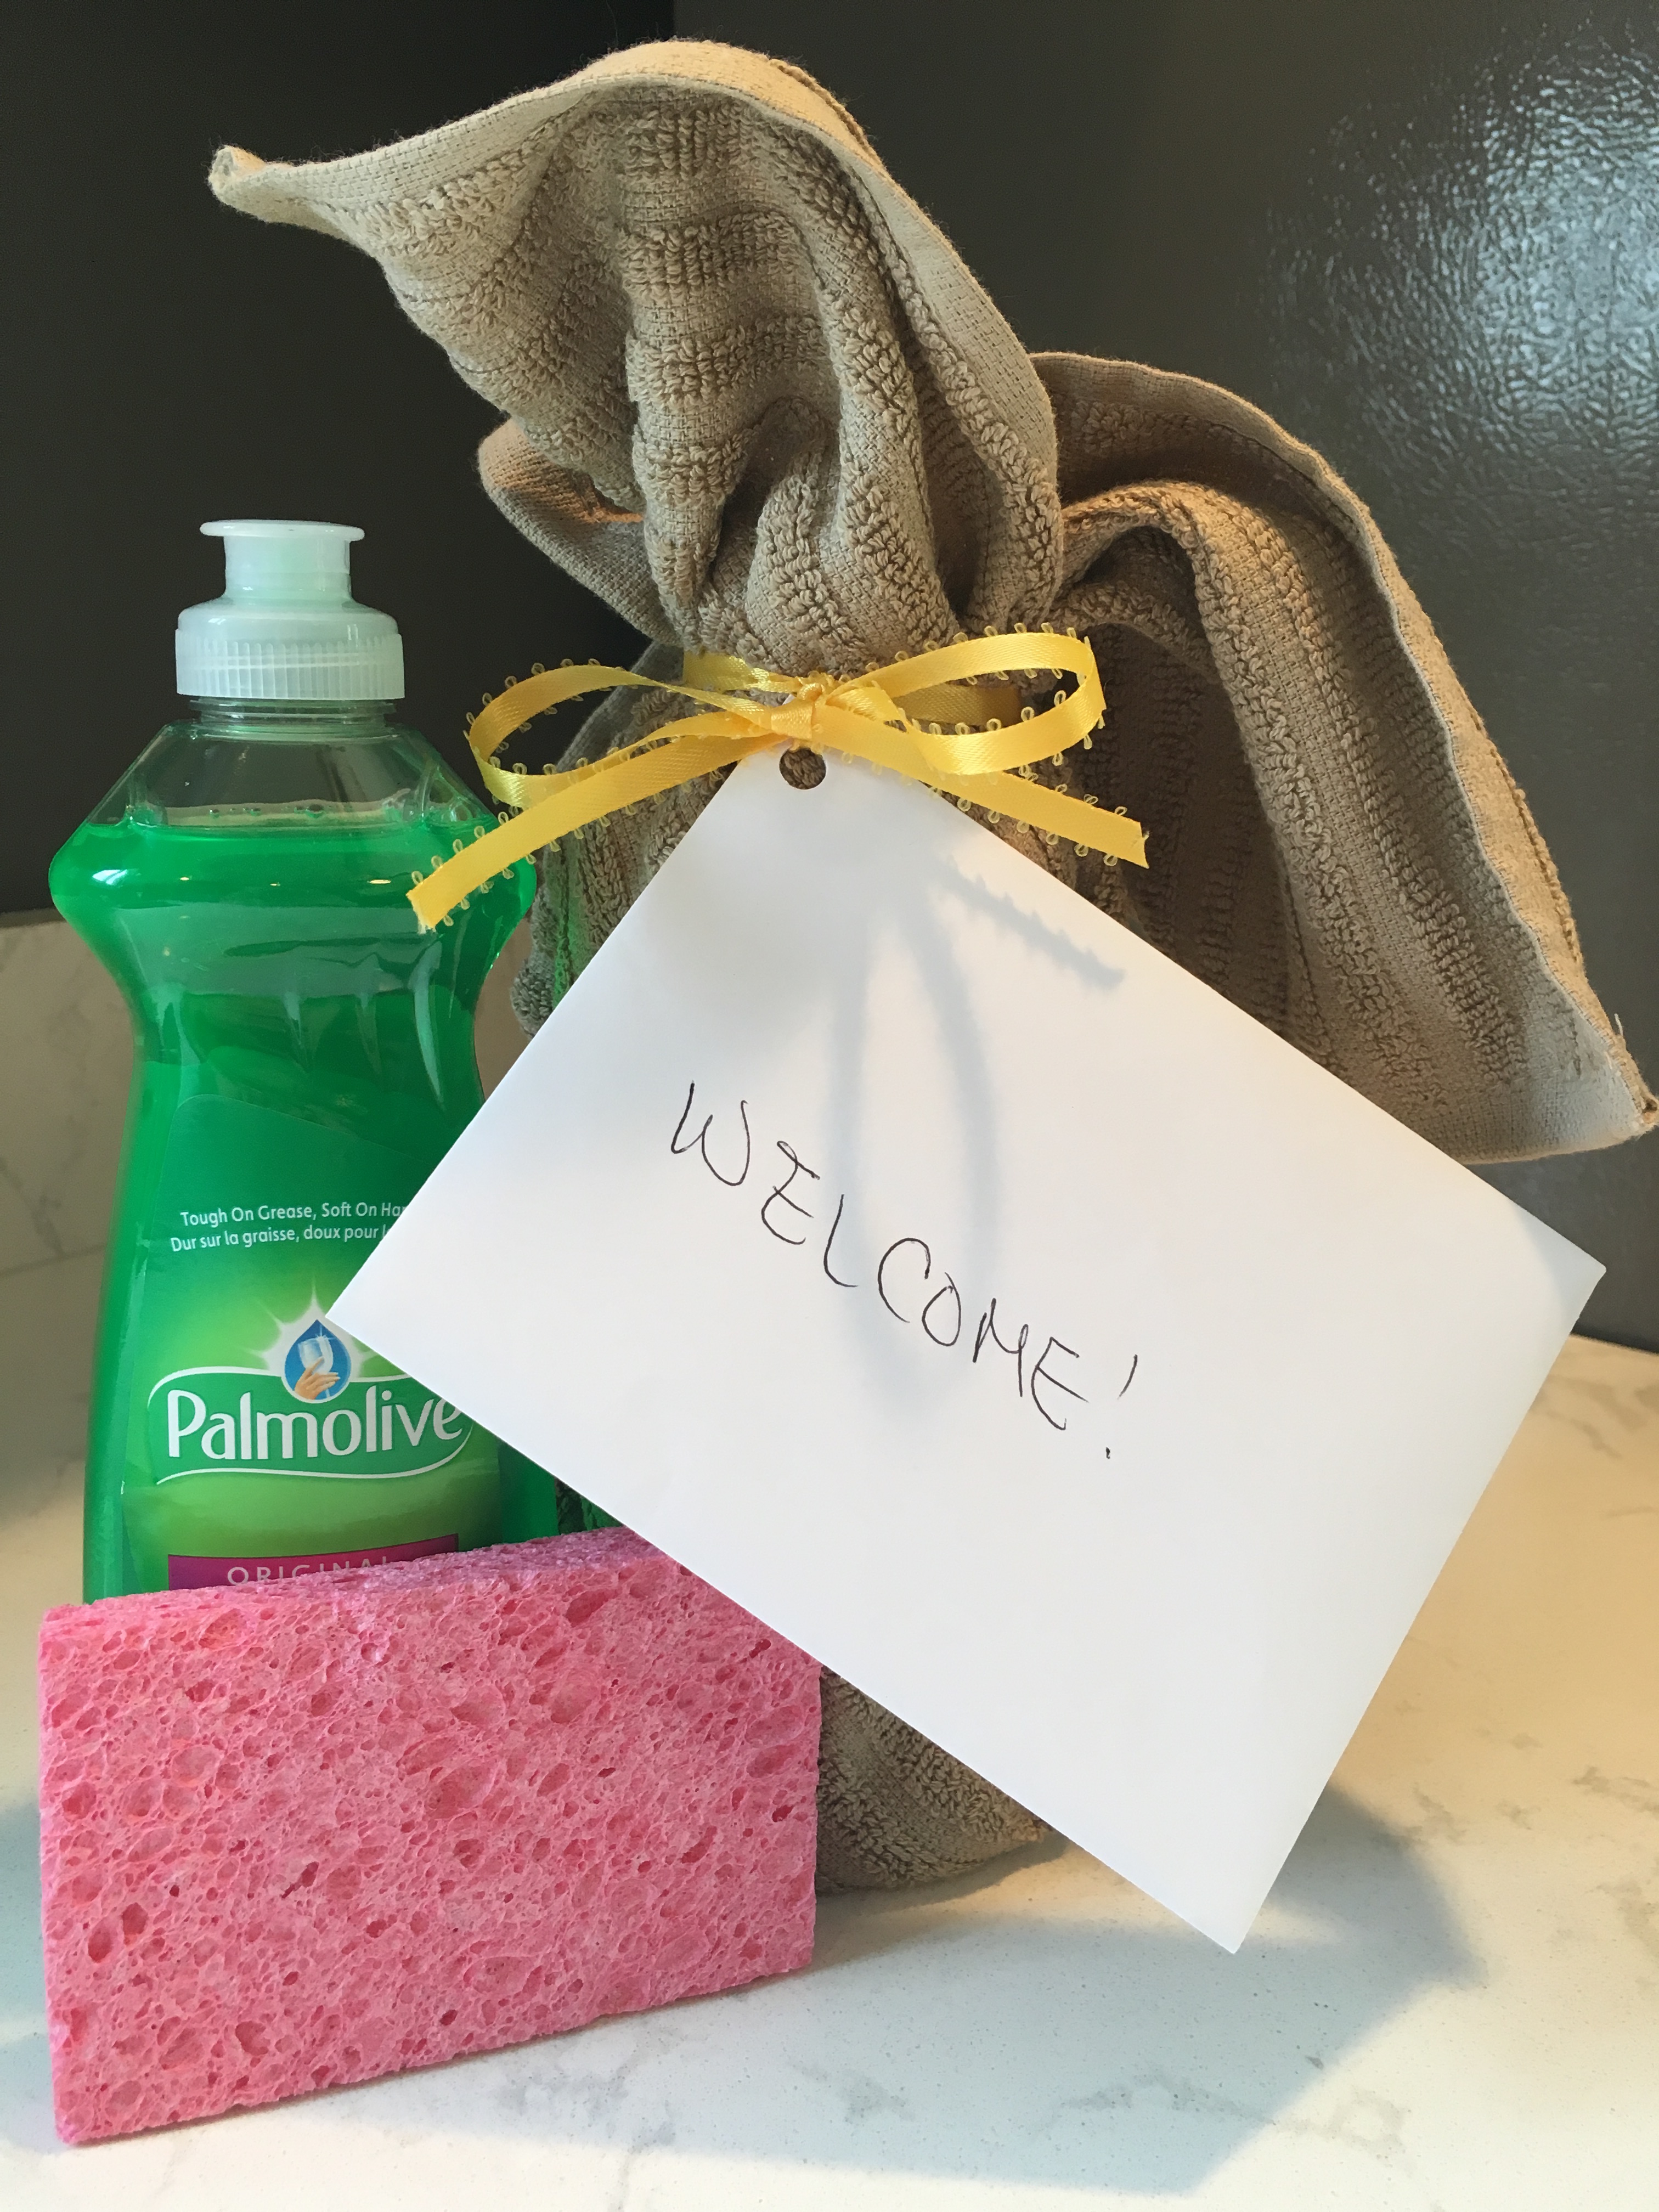
I wrapped a bottle of dish soap and a sponge in a kitchen towel, tied a cute little ribbon around it, and added a note welcoming the new neighbors to the neighborhood. You could even spice it up a bit by adding a fabric flower to the ribbon. It’s nothing fancy, but it’s practical and helps your new neighbors feel welcomed (which I would have loved when we moved to a new neighborhood!).

Update: Brass Be Gone!

Two years ago at about the same time I started this blog (Wow – I can’t believe it’s been that long ago!), I spray painted the knobs and hinges on the interior doors of our home. In that post, I told you I would keep you updated, so here’s the update! Continue reading »

For Sale

Recently, I began selling some of my crafts at a local store. I’m so excited! I hope to have an Etsy shop soon…we’ll see. Be sure to check back in the coming weeks to see if I’ve opened one :). Below are some of the items I took to the local store – chalkboards, chicken wire frames, earring and necklace holders, and ‘I love you because…’ dry erase frames.

Items for SaleItems for Sale


Here are some other items I’ve made…

Do you have any business tips for me???

Chicken Wire Frame

My dad and I are selling crafts at a festival later this year. Here is one item I plan to sell (if I don’t end up keeping it for my own house :)).

DSC01478

Simply staple chicken wire to a picture frame. The frame I used was about 24×21 inches from outer edge to outer edge. I did spray paint the picture frame first – I didn’t like the wood color it was originally, so I used a silvery colored spray paint. When I was finished, it looked too bland, so I added the fabric flowers.

This makes a great picture frame, as it allows you to quickly and easily switch out pictures as often as you like. You could also use it as a place to leave messages, love notes, lists of chores…the possibilities are endless :)!

I will definitely be making more of these.

Happy framing!

Good Company Always Welcome

My dad and I are participating (for the first time!) in a craft festival. We were just approved today to have our own craft booth. I’m so excited :)! Our main items for sale are upcycled windows and frames. So, my task this summer is to rummage for items we can use for crafting.

On my first major rummaging adventure last weekend, I found a gold mine of old windows. I bought 9 of them for $33.00 (that’s just $3.67 each).

Here is one window I created and plan to sell at the festival. The problem – I have no idea how much to ask  for it :/.

DSC01507

Below are step-by-step instructions, along with pictures of the process. Continue reading »

DIY Fluffy Fabric Flowers

This post from Girl Loves Glam was a great step-by-step guide for making fabric flowers. You only need a few supplies, most of which you likely have on hand – fabric, a hot glue gun, some type of circle to trace, a pen or marker, scissors, and a straight pin (optional).

I made two sizes of flowers and used three different fabrics. For the bigger flower, I used a yellow fabric and burlap. For the smaller flowers, I used the same yellow fabric and a white fabric. These flowers were used to add a little interest to the chicken wire frame I made (post coming soon – UPDATE: Here it is.).

DSC01467

These are two of the fabrics I used (burlap not pictured).

Continue reading »

Memory Jar

DSC01023[1]

Our Memory Jar
(It still needs a little pizzazz, I know. I’ll do that eventually.)

After seeing this on Pinterest, I decided to start my own memory jar. I’m really excited!

My husband and I plan to fill our jar with notes of events (happy, sad, big, small, funny, odd, significant, seemingly insignificant, etc.) that happen throughout this year. Two ‘memories’ are in the jar already – yay!

At the end of the year, after reading all the entries, I plan to put them in a scrapbook. I can’t wait! This will be a good way for us to recap the year and see how the Lord has blessed us, guided us, and strengthened us along the way.

It’s not too late to start your own memory jar, so get goin’ already :).

DIY Bulletin Board #2

Today I finished the second bulletin board I began on the same day I completed this similar project.

My husband and I needed a place to put our lists – shopping lists, grocery lists, to-do lists, etc. Here was my solution:

Continue reading »

DIY Bulletin Board

I finally had some time to be creative today. I started a couple projects and actually finished one of them. Yay!

(UPDATE: I finished the second project as well! Check it out here.)

I recently revamped my office (see that whole process here, here, and here). I finished the accent wall, but had nothing on any of the other walls. Given this is an office, I thought a bulletin board would be practical. The ones you find at the store are usually plain and ugly, so I made my own!

Here are the supplies/before picture:

Continue reading »

Office Redo Part III-Accent Wall

Well, I’ve (almost) finished the accent wall of my office. I’ve been working on this redo project for months now. See Part I and II here and here. It’s taken me longer than I expected – finding time to complete all the finishing touches has been difficult.

All the décor on this accent wall, with the exception of the yellow leaves (which were originally white), was found at a thrift store/rummage sale, was given to me or was something I already had around the house. In other words, this project was cheap! Continue reading »