I have been looking all over for my inspiration picture and can’t seem to find it anywhere on my computer! Ugh. I guess I’ll just have to show you the final products by themselves.
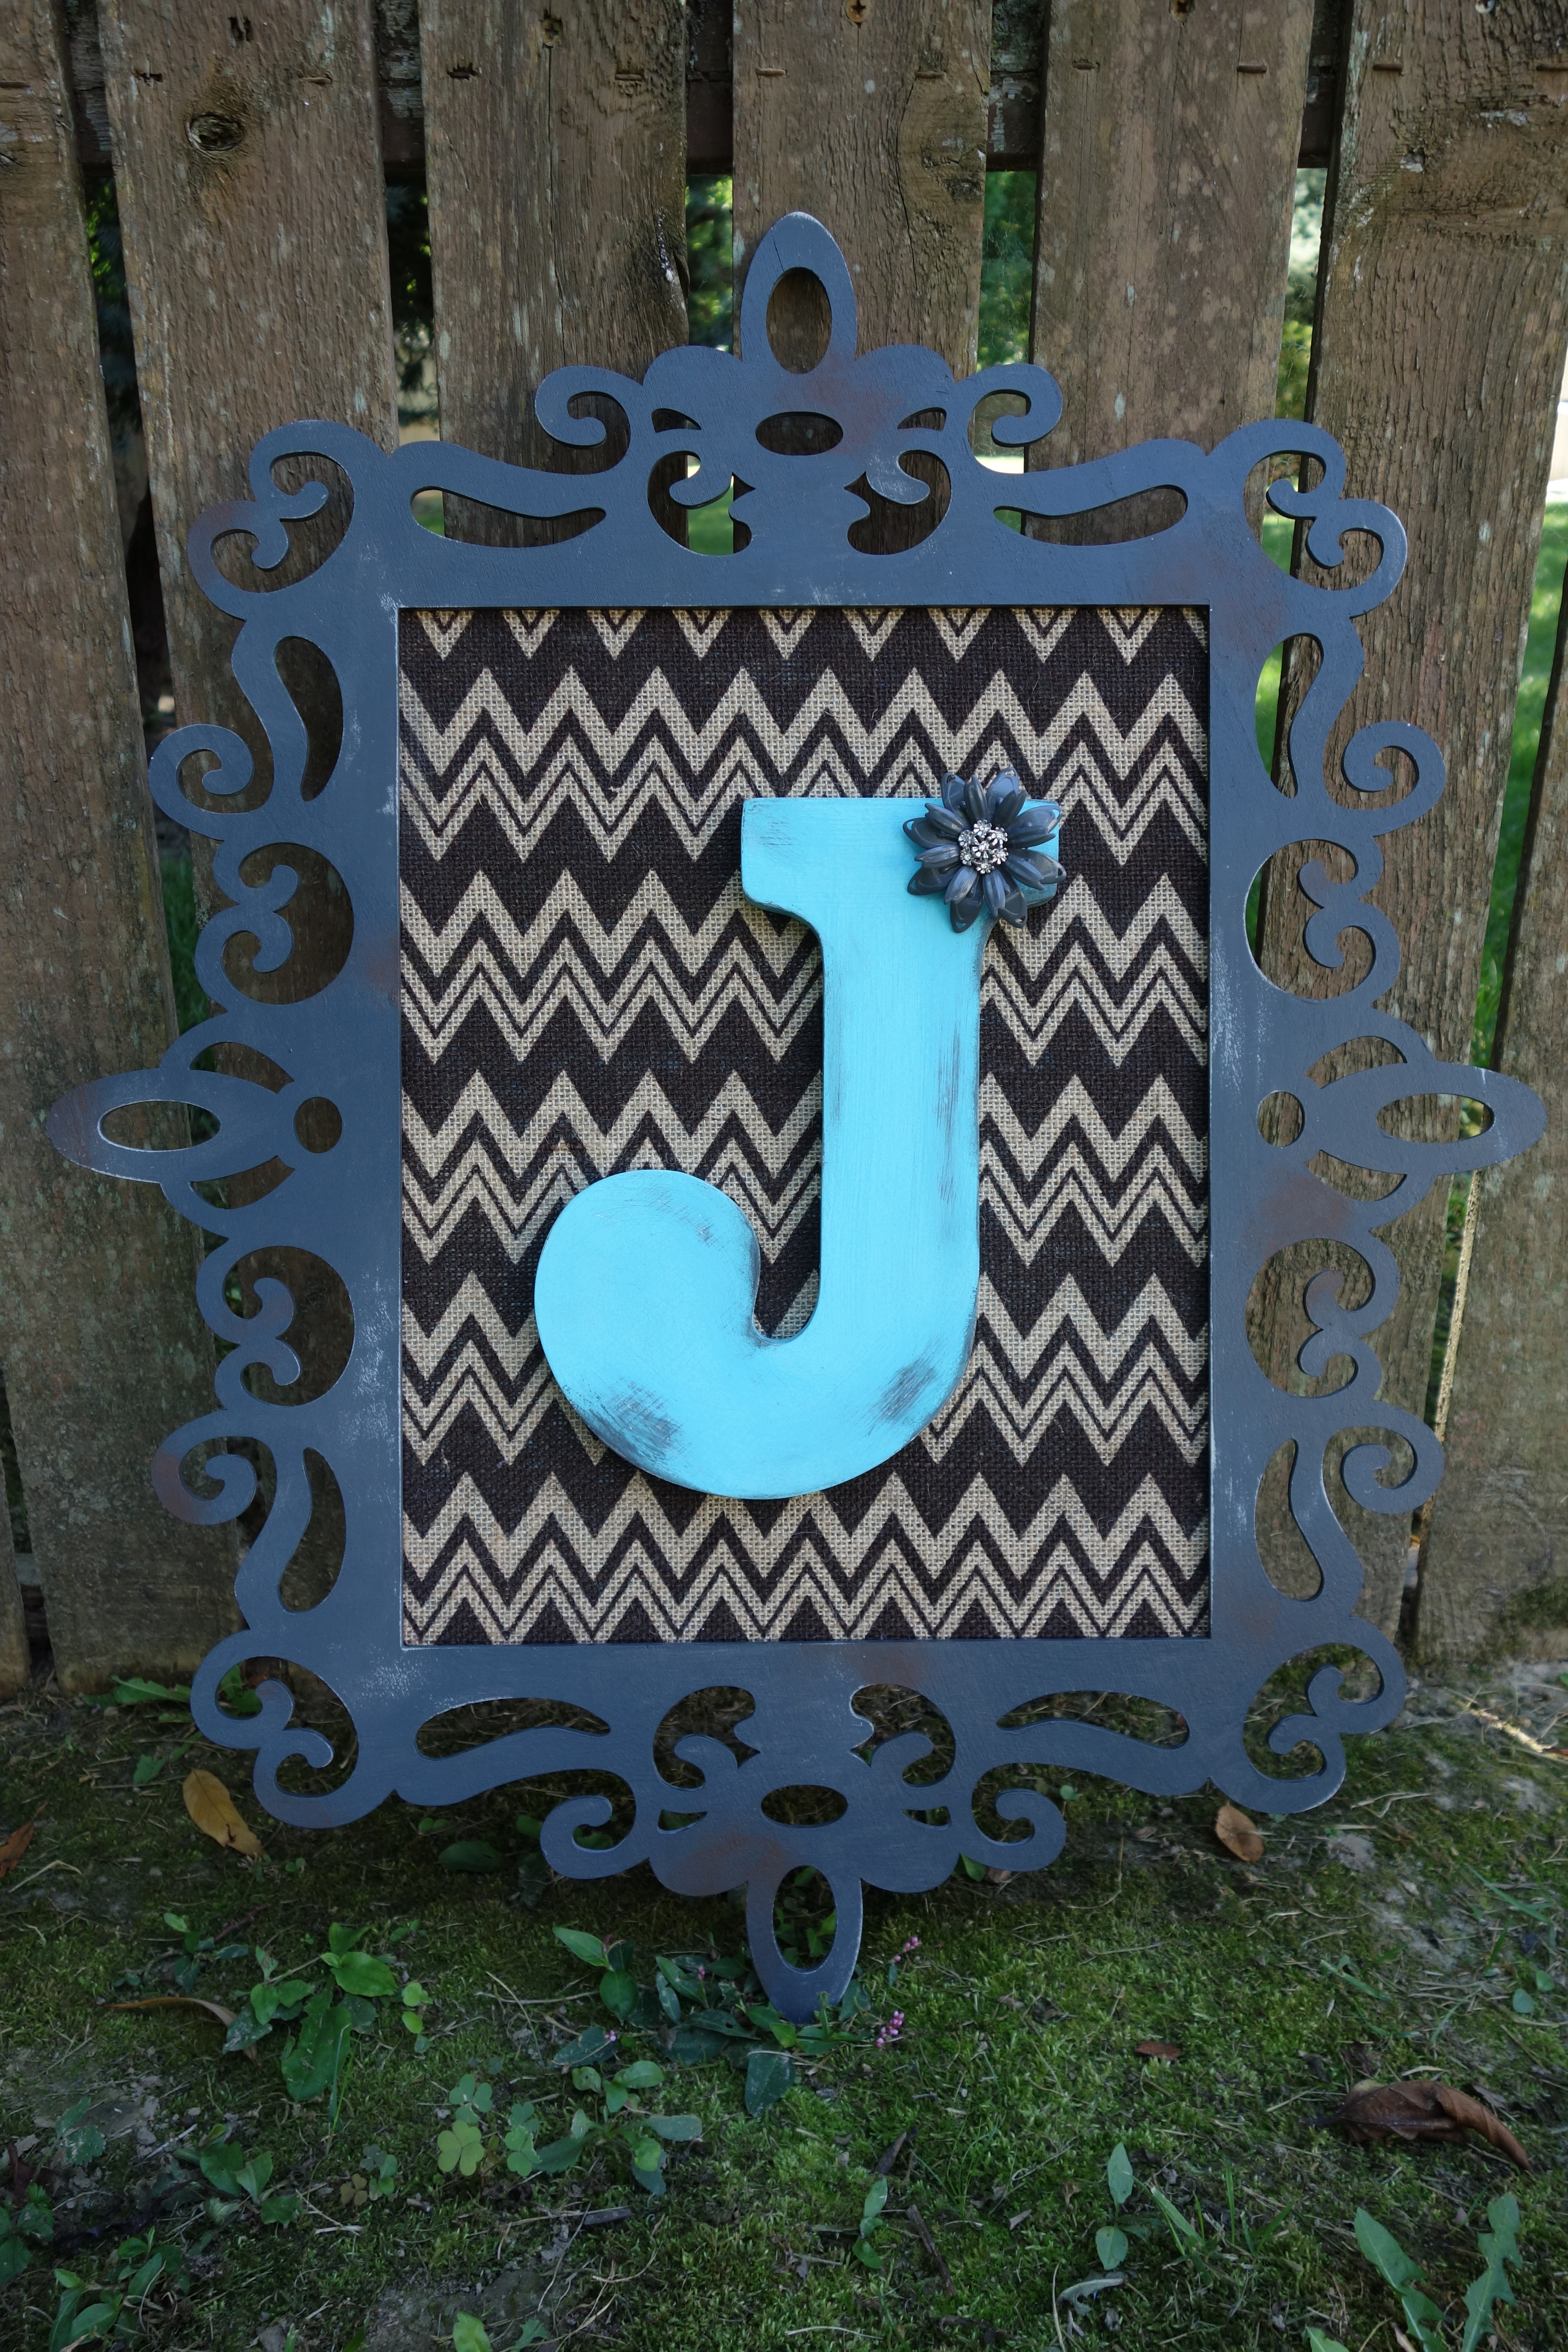
Here are the personalized ornate frames I made for a couple individuals:

Here’s how to make it…
Where to Find the supplies
Frames and letters –> Michaels
Paint (sample sizes) –> Lowes
Burlap –> Joann Fabric
Flowers –> Ebay
NOTE: I bought metal flowers from Ebay because the inspiration picture appeared to use a metal flower. However, in the future, when I’m not necessarily trying to make the item look as close to the inspiration piece as possible, I will probably make my own fabric flower. Here is one type of fabric flower you could make. There are many other types as well; just search for them on Pinterest.
Painting your Frame
Prime your frame with a light grey spray paint primer. Paint your frame with the dark grey paint using a small sponge brush. After the first coat dries, dabble on another light coat of the dark grey paint. Let this dry, then dabble some of the chocolate brown paint in some areas to create a distressed look. I also dabbled some gray in with the brown while the brown was still wet to help blend it in a little. After all the paint is dry, rough up some edges a bit with sand paper. The light grey primer will start to show through as you sand. You can see the brown paint and sanded areas in the picture below.

Painting and Embellishing the Letter
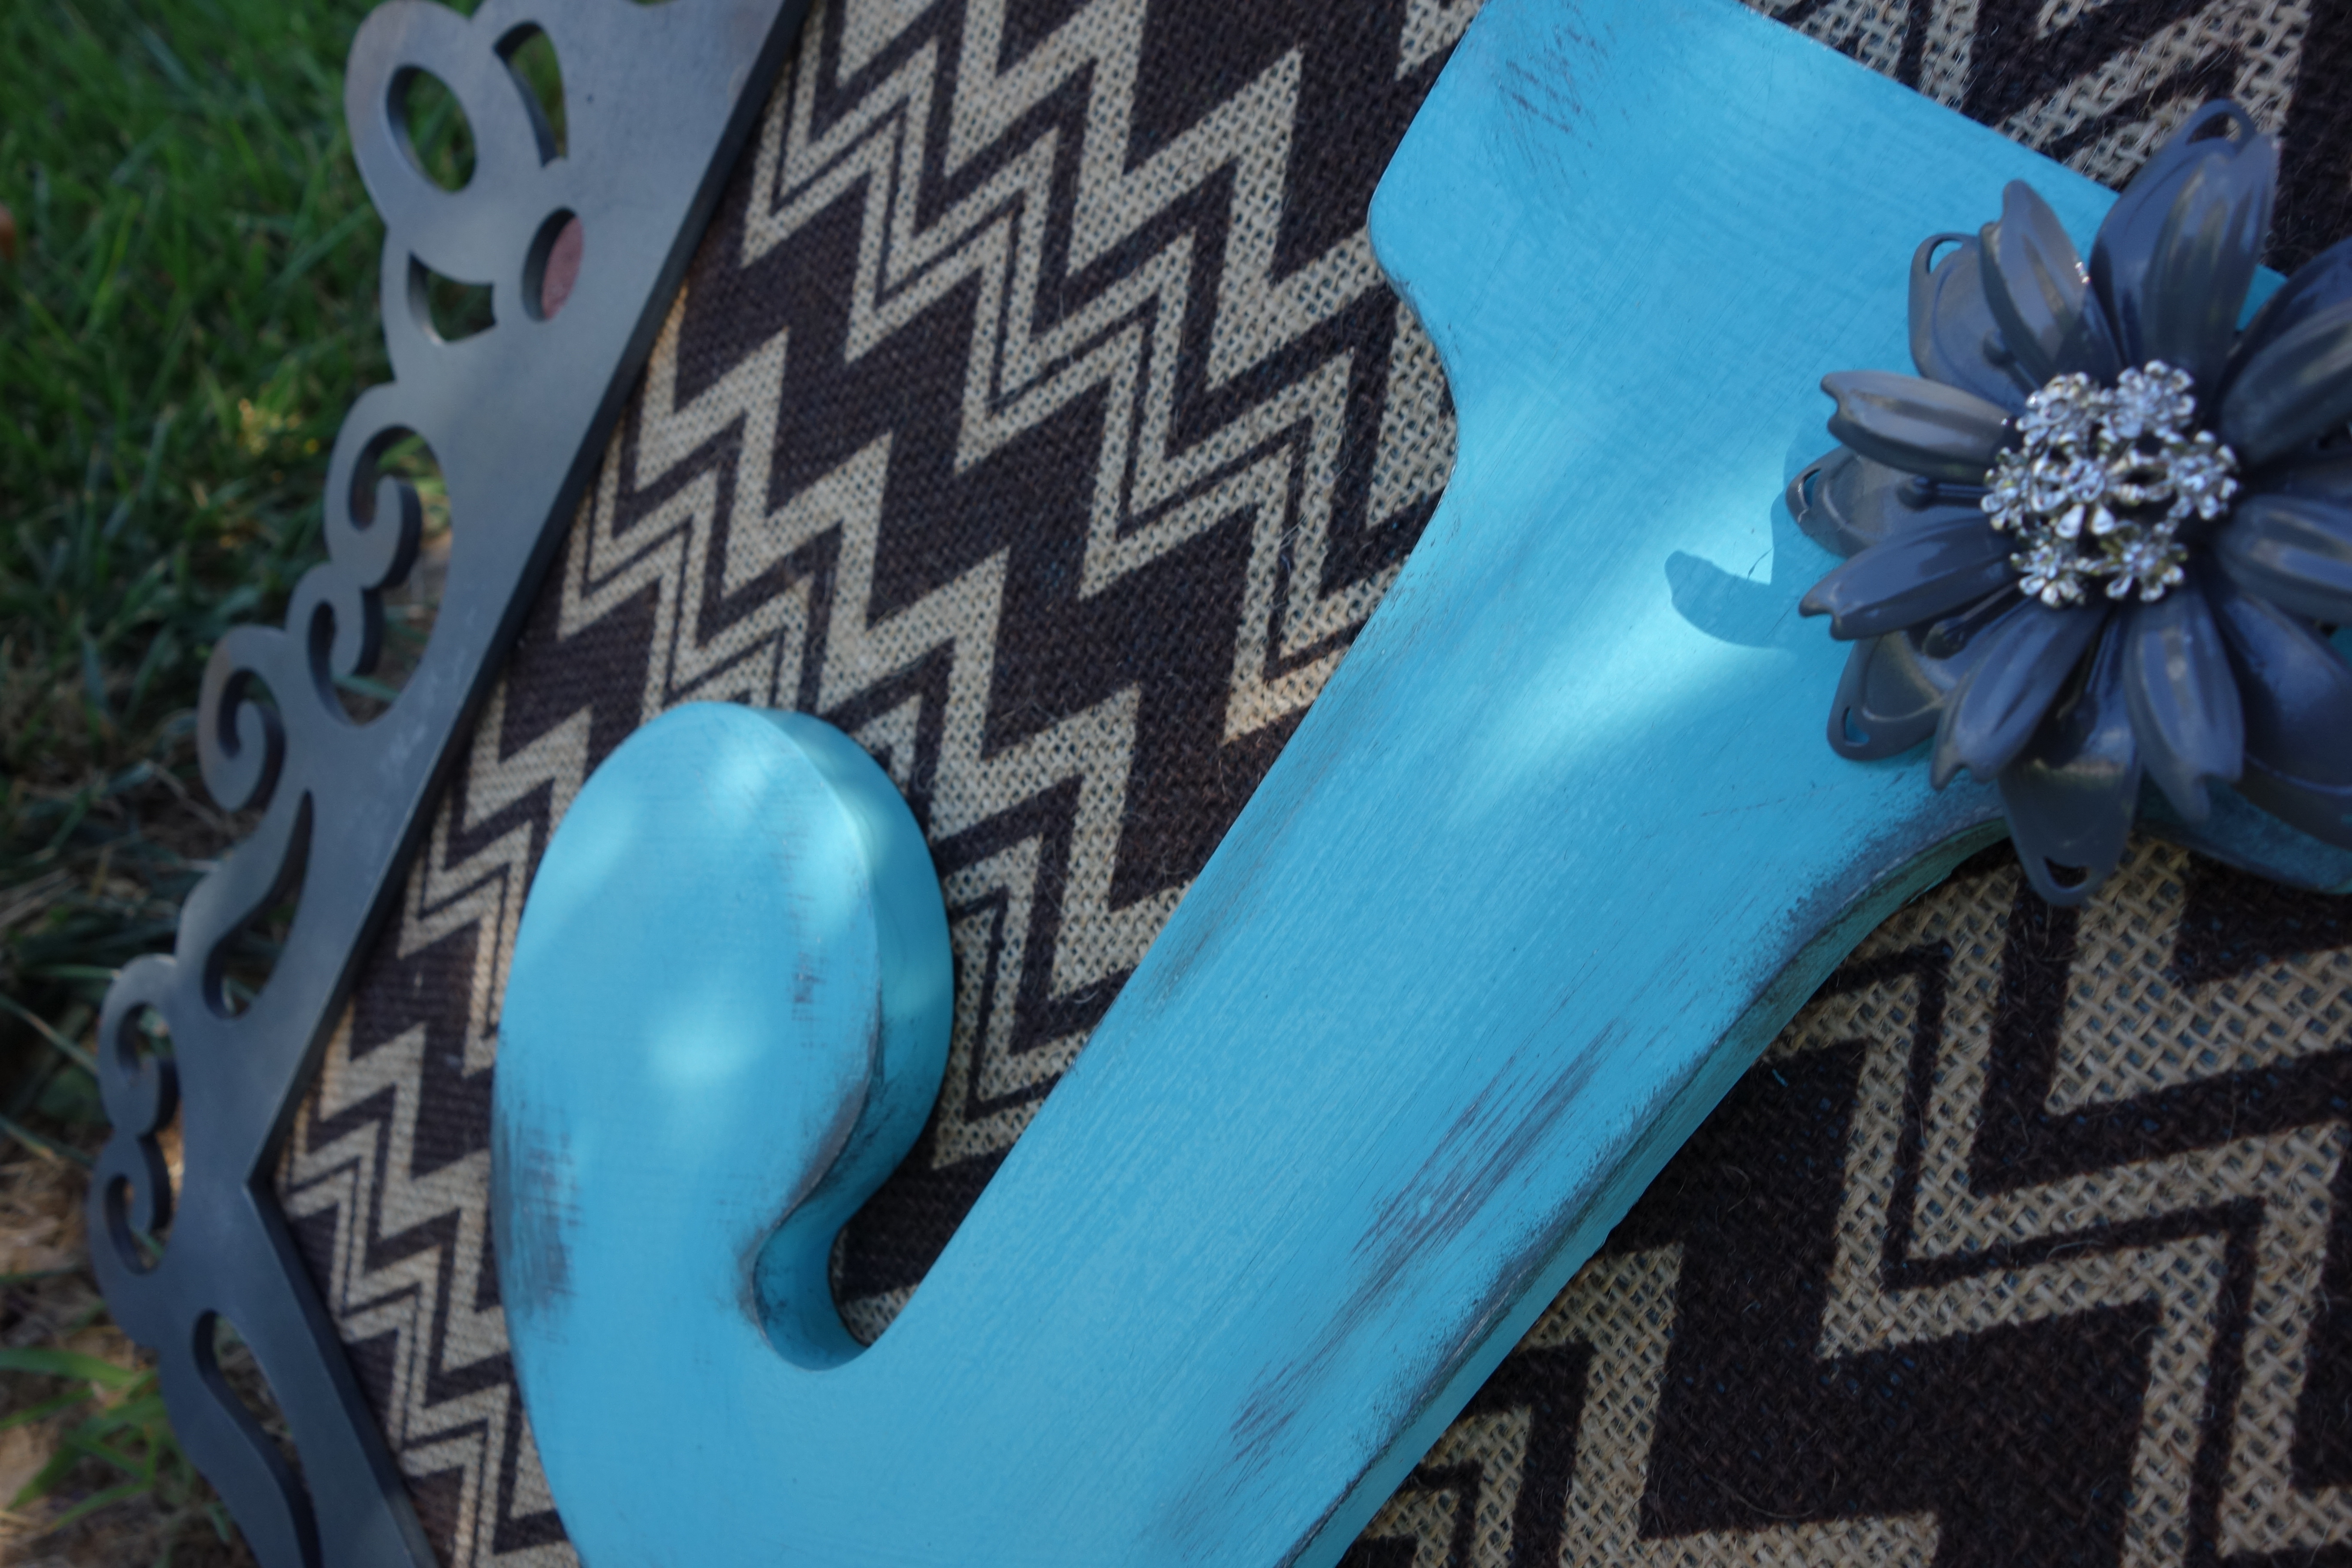
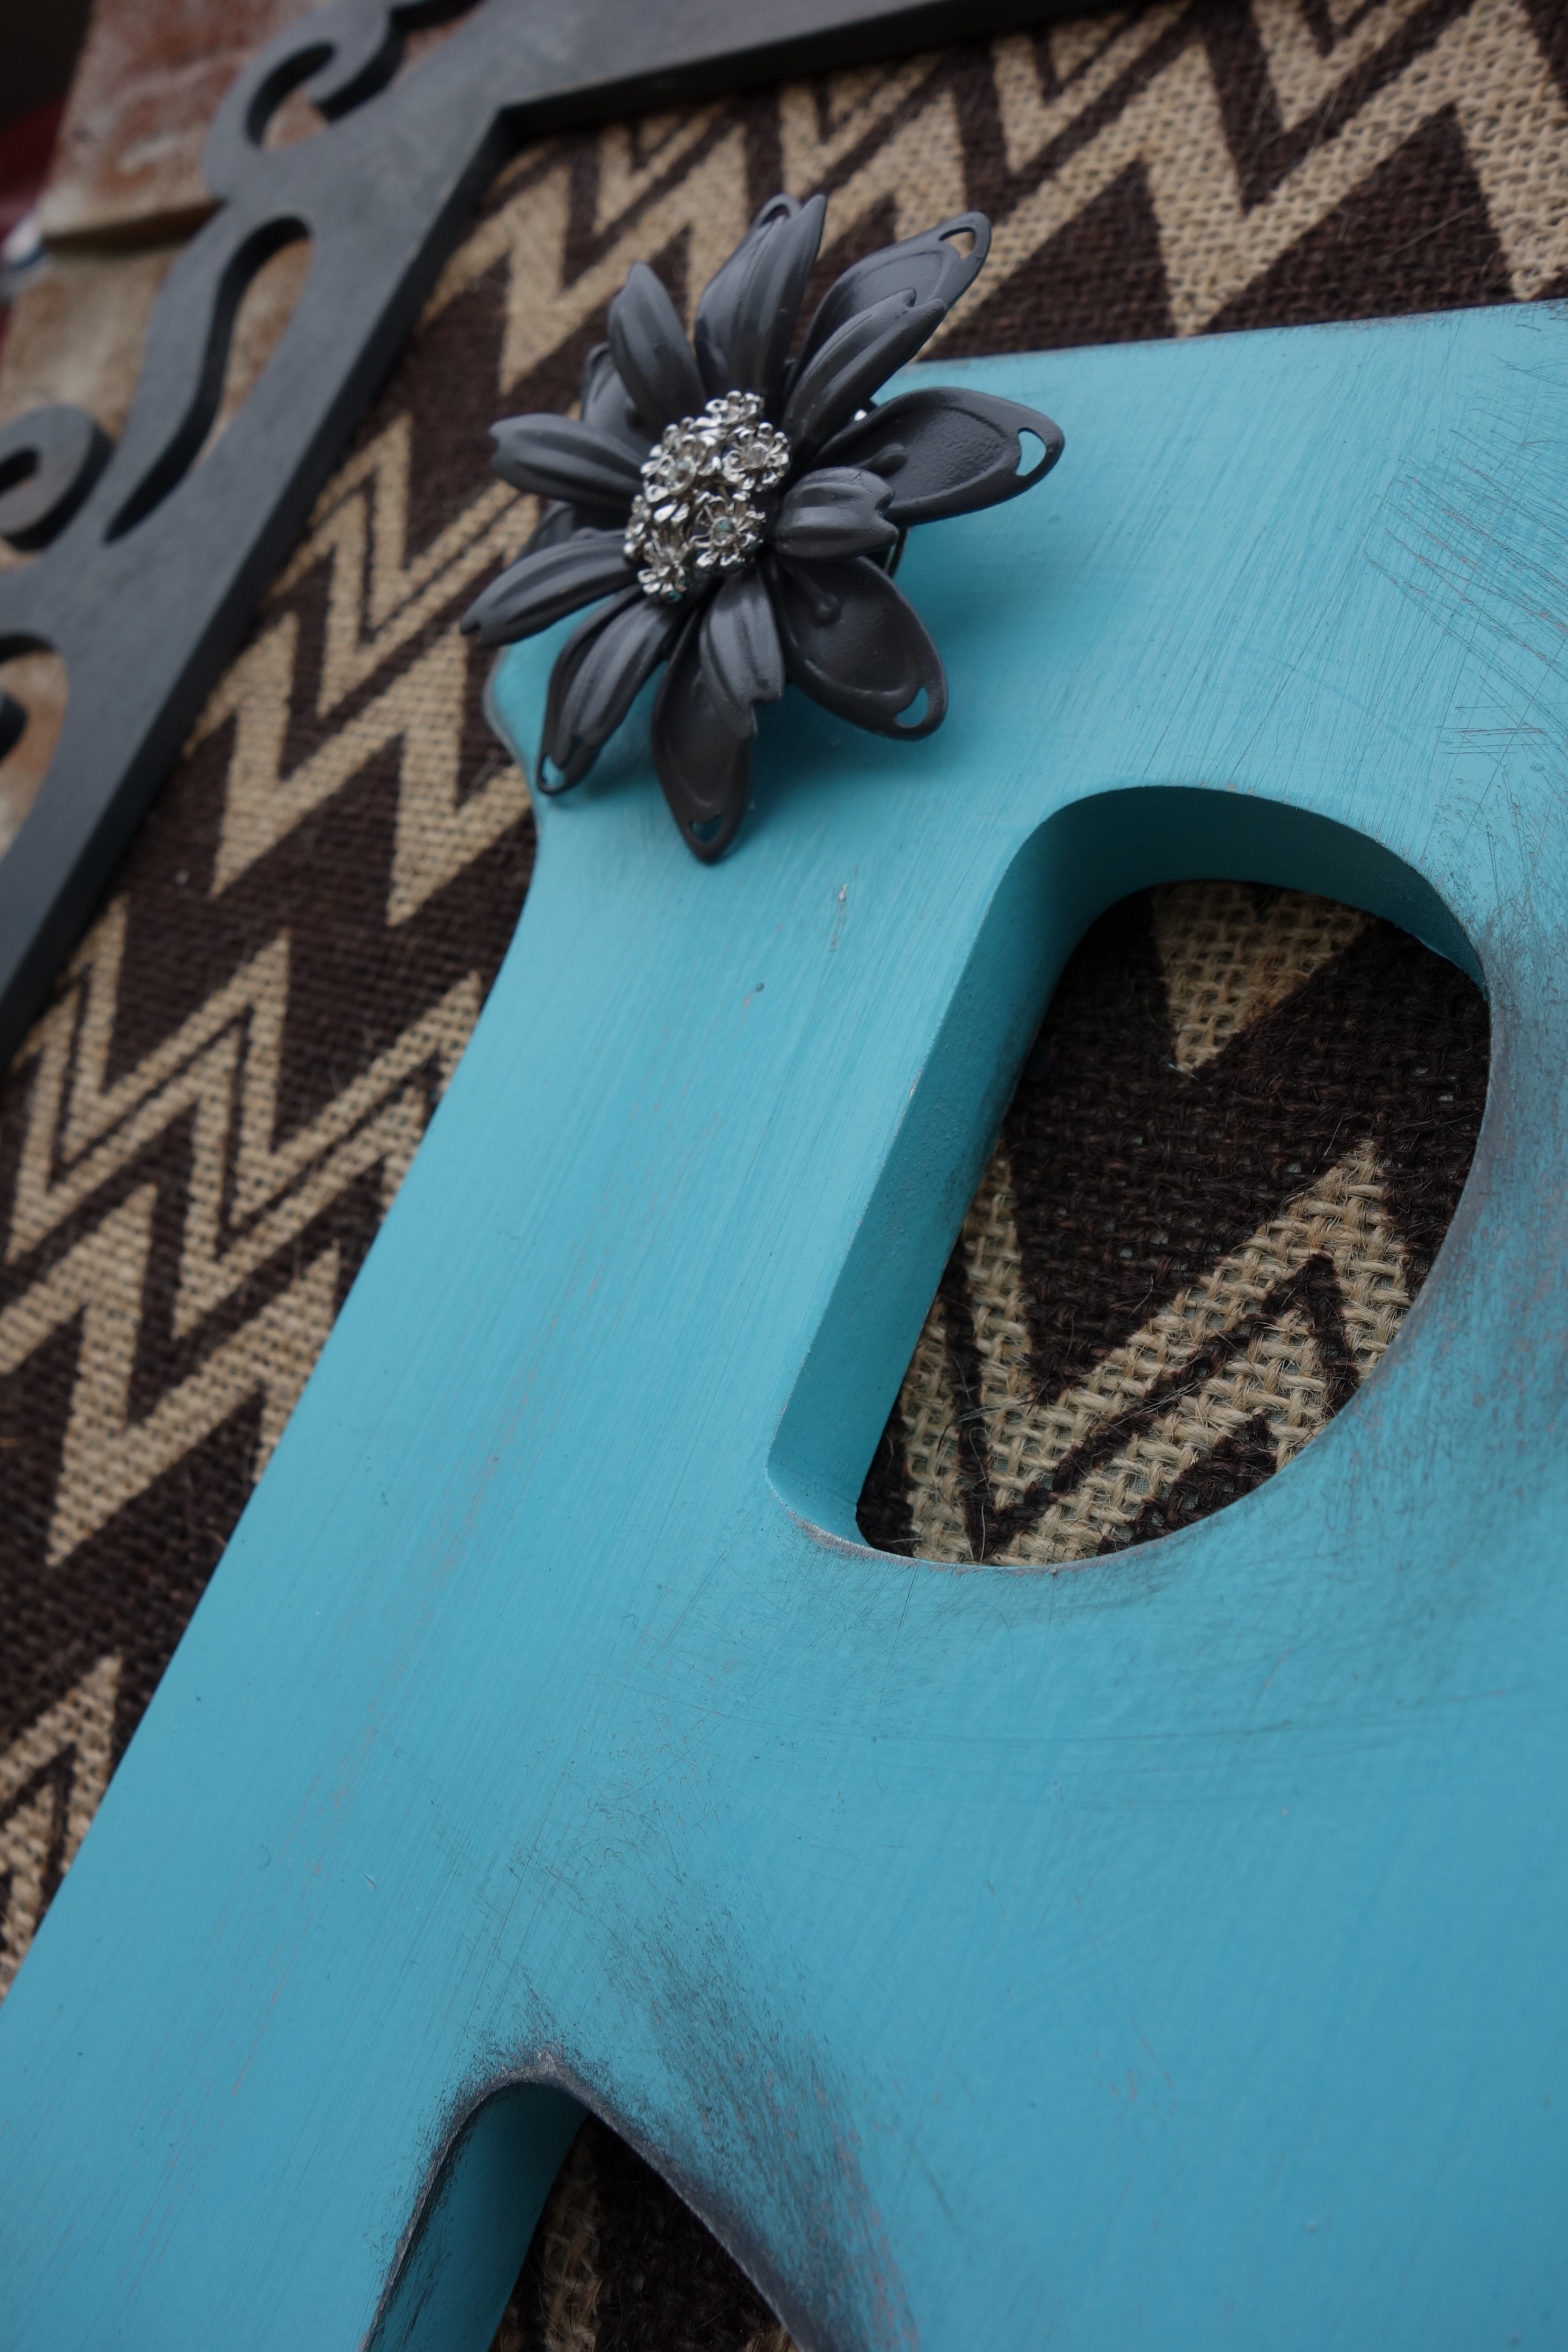
Begin by painting your letter dark gray with a small sponge brush. Once this is dry, give the letter two coats of teal paint, letting the first coat dry before brushing on the second. After the paint is completely dry, rough it up a bit with sand paper. I also dry-brushed some dark grey and brown paint on the letter to give it more of a distressed look. See the pictures below.
Add your flower using hot glue. The flowers I used were actually brooches I purchased from Ebay. I was so excited to find them – they were a perfect color match and worked so well for this project.
Creating the Burlap Backdrop
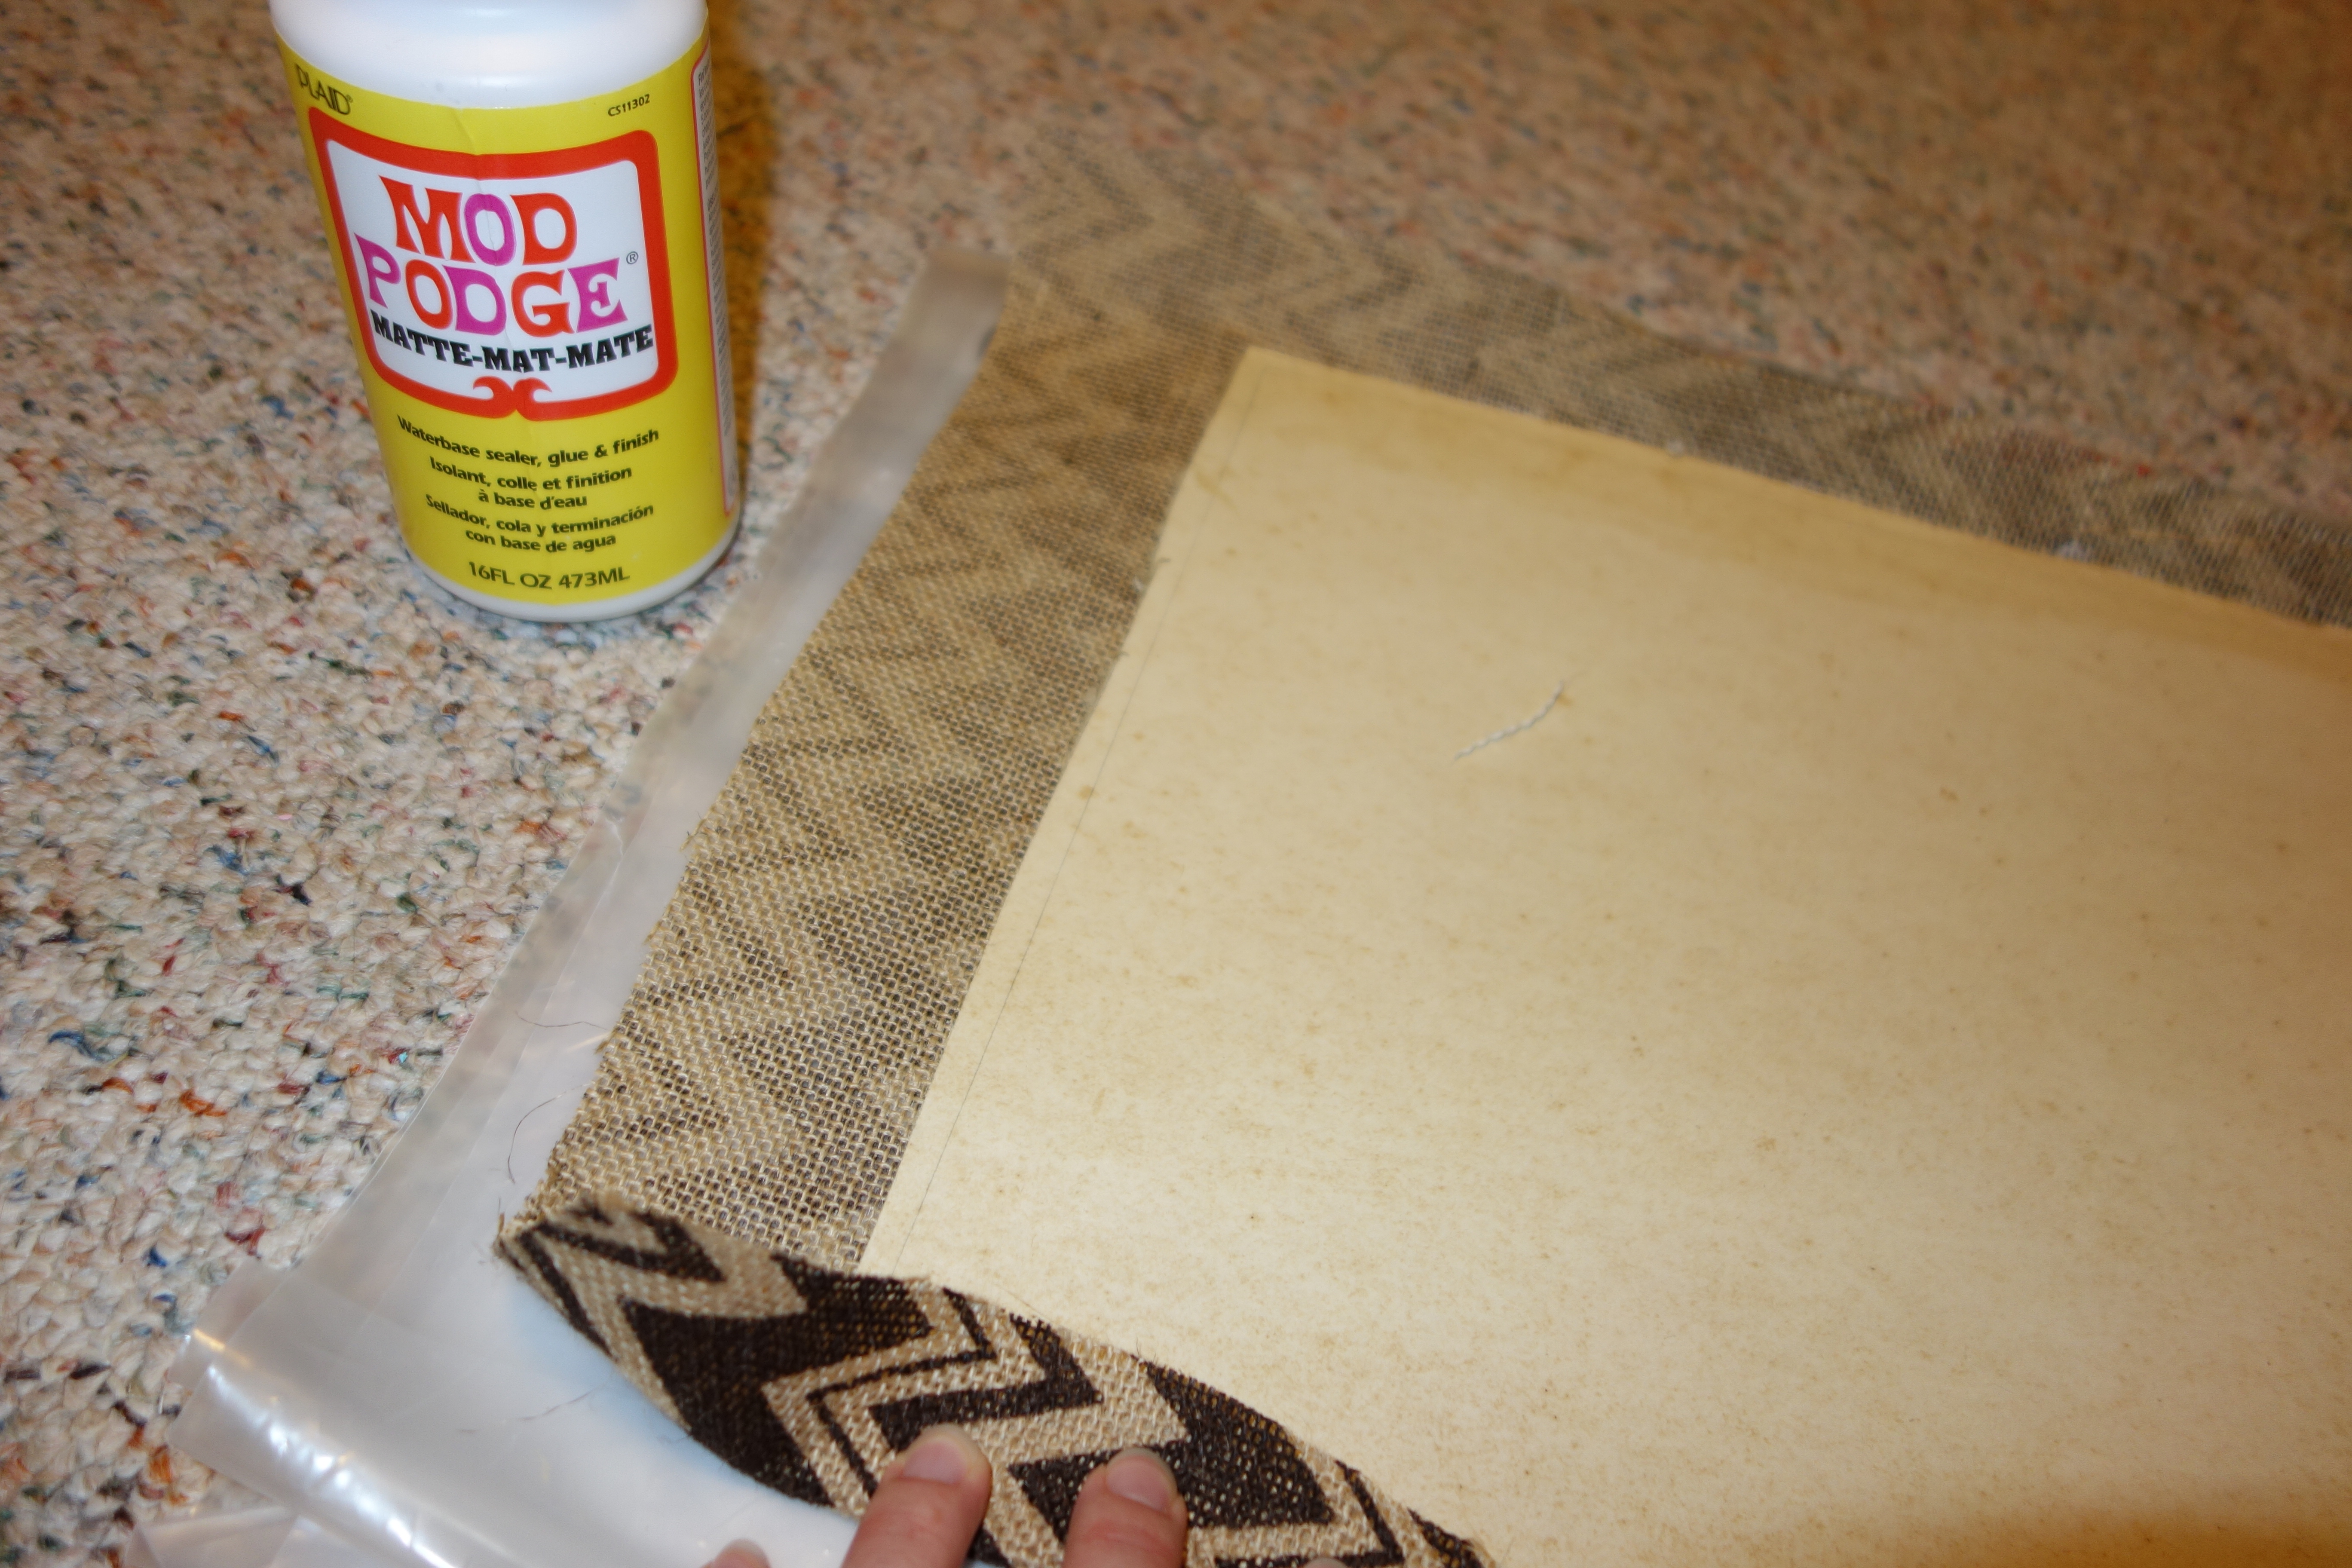
Using a utility knife, cut out a piece of cardboard slightly larger than the opening of the frame. Below you can see the outline of the frame I drew on the cardboard. Notice I actually cut the cardboard a little larger than the outline I traced. Now, cut out a piece of burlap that’s larger than the cardboard (about an inch or so larger on each side). Use Mod Podge to glue the fabric to the front of the cardboard. Once this is dry, fold the excess burlap over the back of the frame and secure it with hot glue.
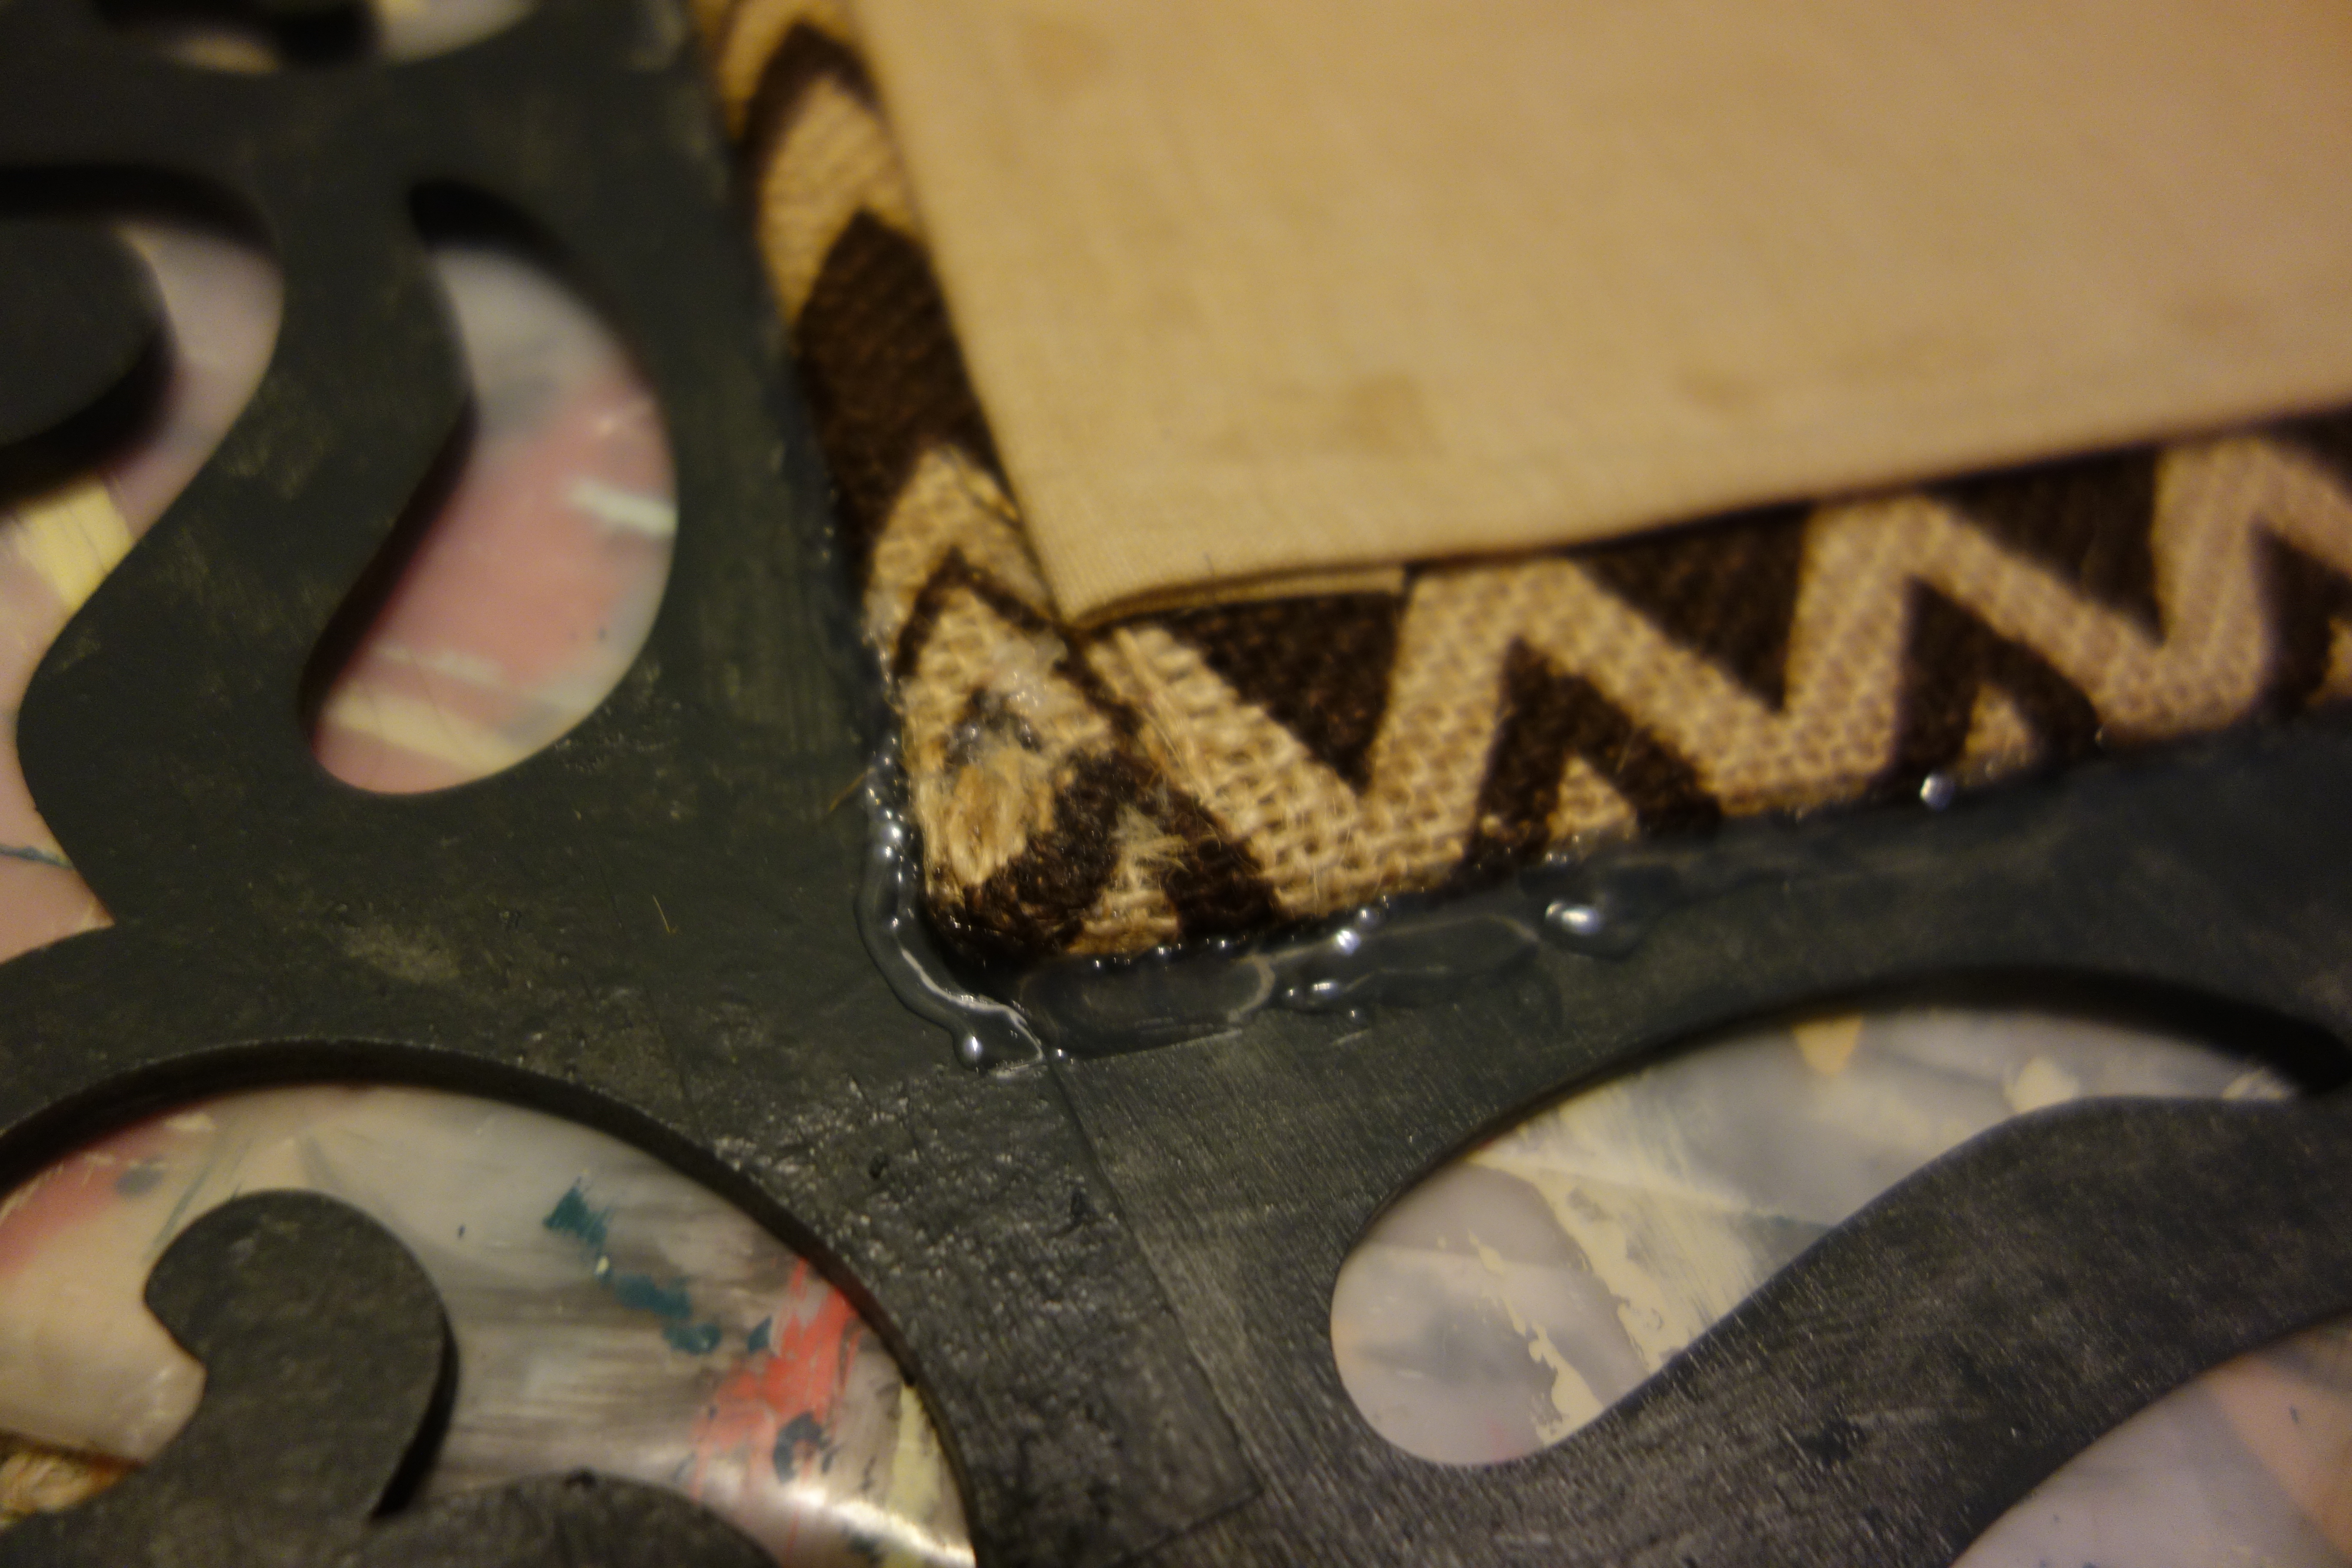
Putting All the Pieces Together
Using a glue gun, hot glue the burlap-covered cardboard to the back of the frame. See the picture below. Use plenty of glue, but be sure it doesn’t seep out in the front (that wouldn’t look very pretty, now would it? :)). Let this dry for several minutes. Now, glue your letter to the burlap with a hot glue gun.
Voila! You’re finished. Take a look at the finished products once more…
Make one for yourself or to give as a gift. Or, if you don’t feel up to it, contact me, I’ll be happy to make something similar for you!
